Templates
 Templates in RigBridge provide a structured way to create standardized digital work instructions, ensuring consistency and efficiency in drilling operations. The purpose of the Templates feature is to develop Master Plans— centralized reference documents containing the best practices, learnings, and standard procedures that can be reused for new projects. By utilizing templates, you can streamline the planning phase and ensure that instructions are consistent across different projects.
How it looks
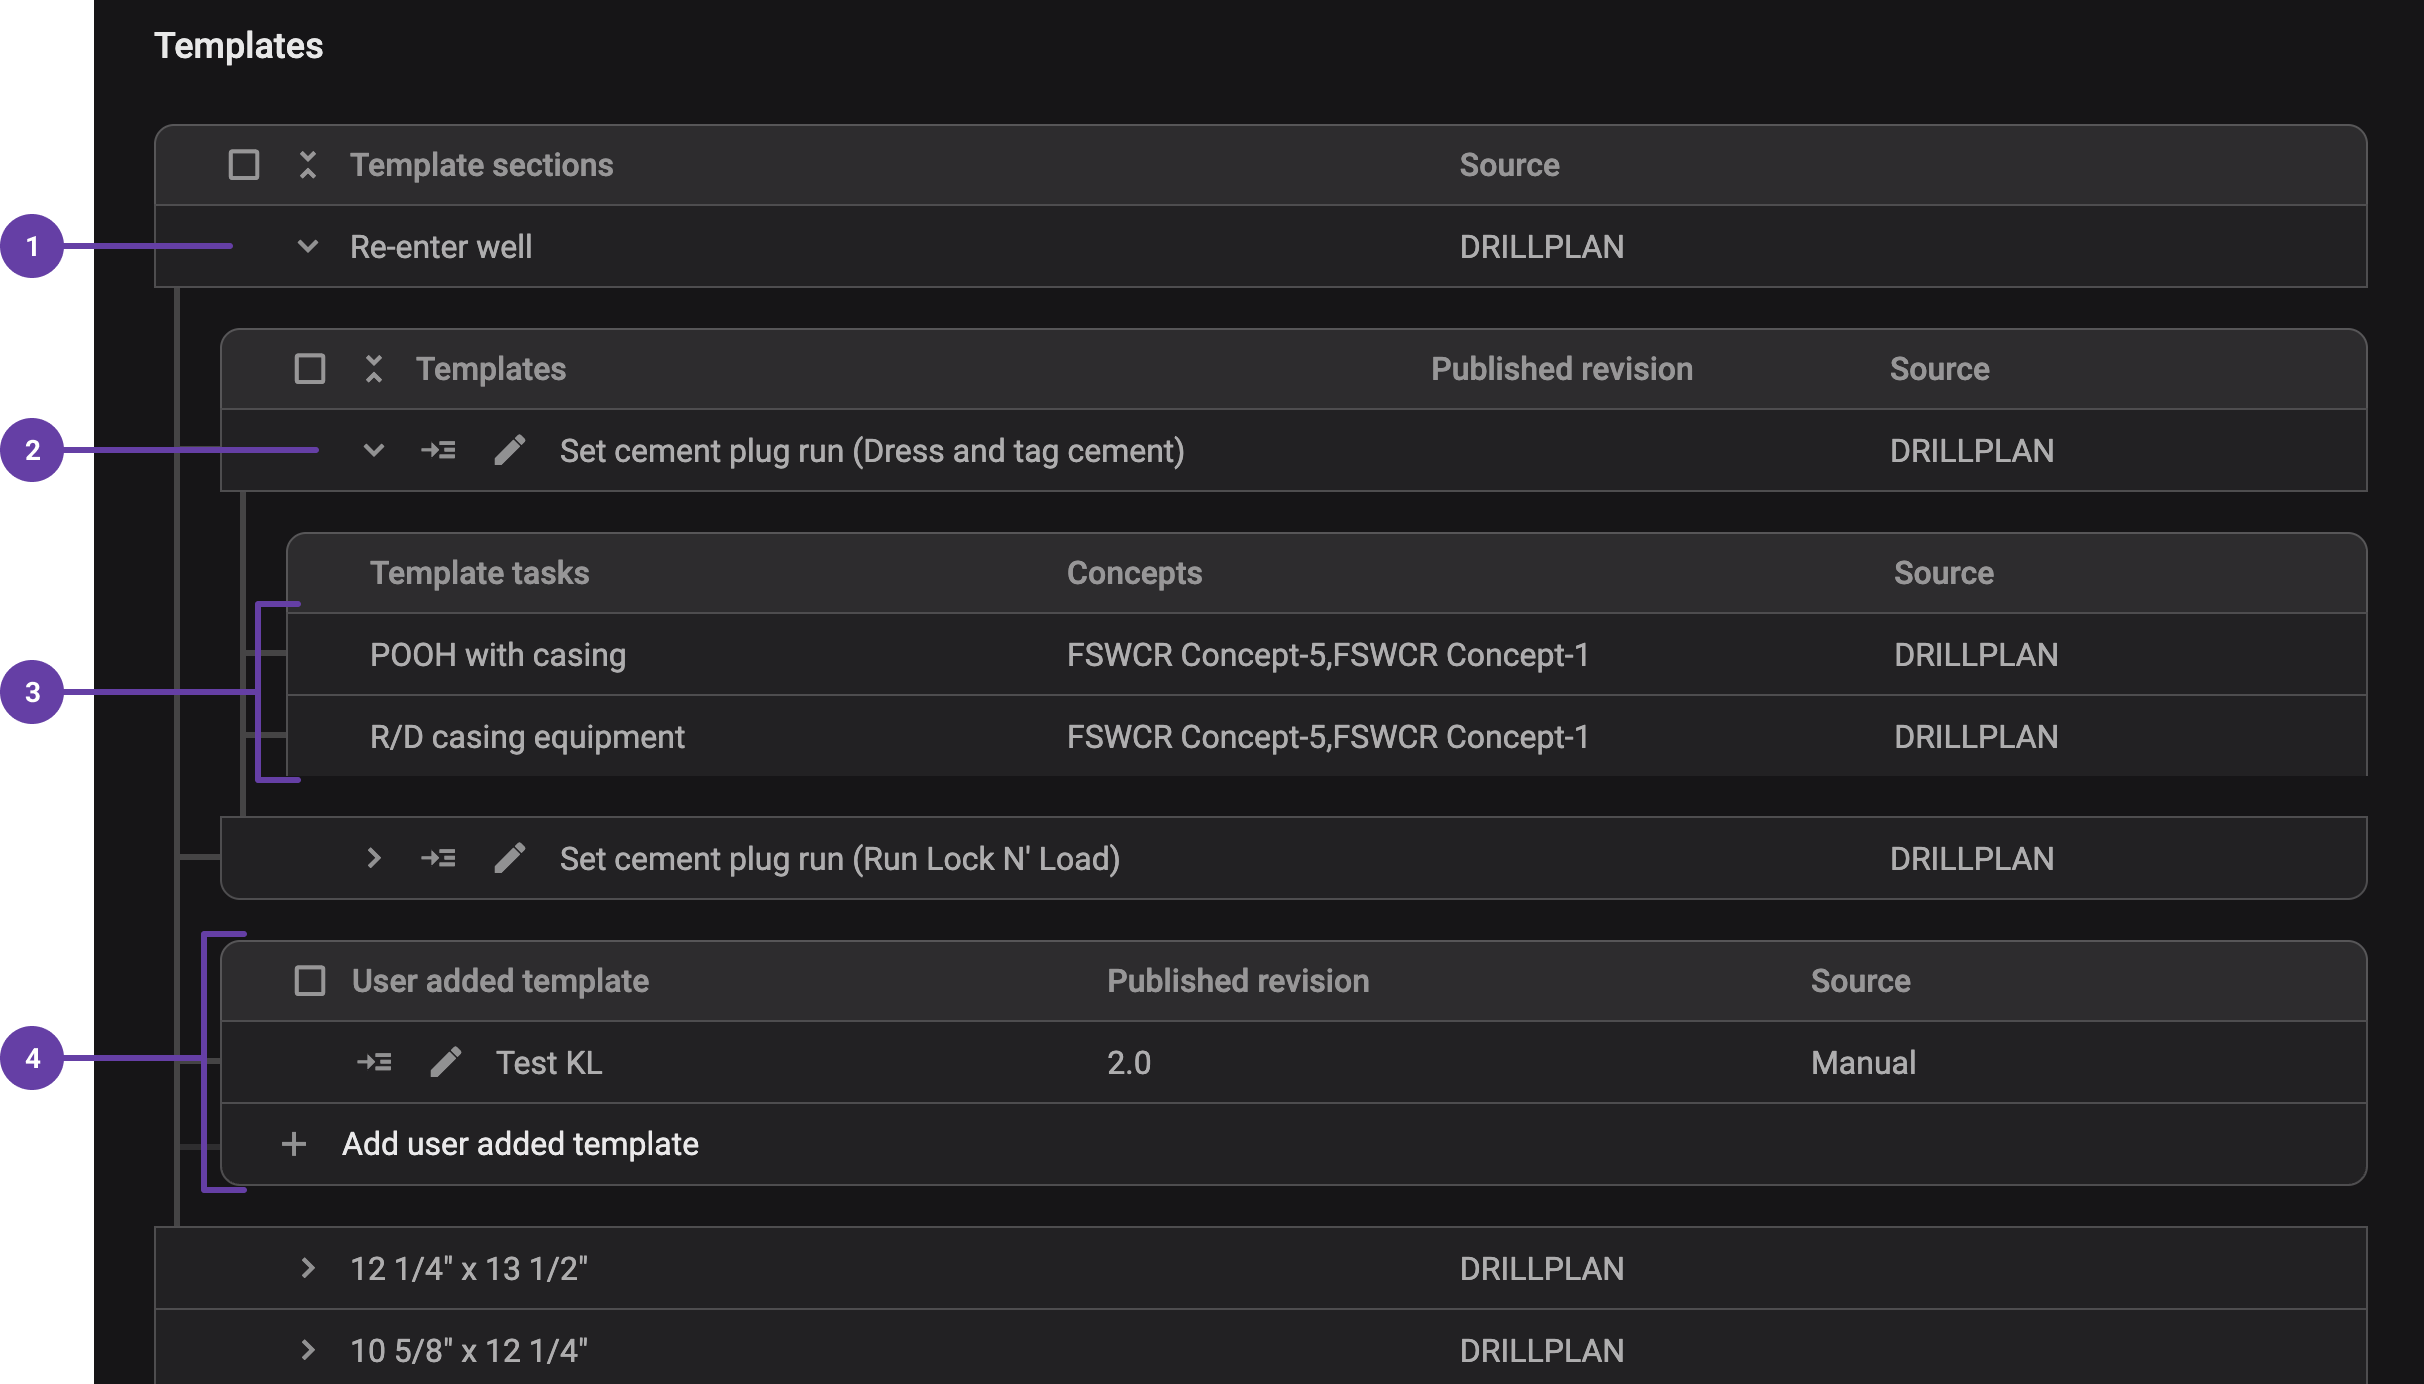
The Templates feature is available within RigBridge, integrated with a third-party system and/or manually add templates. It provides an overview of all sections created in a Master Project, merging information from different variations/tasks and organizing it in a clear hierarchical structure:
Sections/Phases: Represent different parts of a well project.
Runs: Contained within sections, representing drilling operations.
Notice
This is the level on which Templates will be created.
Tasks: Listed under each run, coming from the third-party integration.
User added templates: Custom templates created manually. They sit alongside system templates but are marked separately and can include tasks, steps, and variations for specific rigs or scenarios.
Right sidebar Functions
The right-side panel provides additional details and management options related to templates:
 Properties Panel: Displays metadata related to a selected section, run, or task.
Title of the run
Source
Created date and revision information
Associated variations.
 User-Added Properties: Additional properties can be assigned within the template by clicking on the
  edit icon.
Icons and Functionalities
 Expand/
 Collapse Sections: The button at the top allows for quick expansion or collapse of all sections.
Step-by-step instructions
Accessing the Template Overview
Navigate to the
Templates overview section in the left sidebar.Or click on the
Templates icon in the main interface.The overview displays all sections from the third-party integration's Master Project.
Exploring Sections and Runs
Click the
 arrow next to a section to expand it.
Templates within the Template section will be displayed.
Click on a
templates arrow to reveal associated template tasks.
Viewing and Managing Properties
Select a template to open the
Properties panel in the Right sidebar.Review key details such as title, source, date, and associated variations.
Use the
User-Added Properties feature to add custom information.
Expanding and Collapsing Sections
Click the
 expand all button to view all templates at once.
Click the
 collapse all button to hide detailed information.
Add a user added template
Open the Template Overview: Click the arrow next to the section title to expand and view both system templates and any user-added templates.
Add a Template: You’ll see a list of user-added templates and a button to add more. If none exist yet, you’ll only see the + Add user added template button - click on it to create your own.
Name the Template: Enter a title for your new template.
Edit the Template: Once saved, click to open it in the Template Editor and start customizing it.
Examples
Drilling Engineer: Creates a template that includes standardized plans to set up a new variation, ensuring consistency across all projects.
Well Planner: Reviews the Template Overview to verify that all tasks from the third-party integration are correctly assigned to each variation before finalizing the drilling plan.
Tips and tricks
Use
Expand/Collapse to quickly navigate large templates. Activate Notifications to stay updated on changes.
Verify Revisions in the Properties Panel to ensure you're using the latest version.
Only approved templates are published and can be used in Plan editor.
Troubleshooting
Tasks are not editable: Tasks come directly from a third-party integration and are read-only. Any modifications must be made within the third-party integration.
Updates from the third-party integration are not reflected: Ensure the latest version has been synchronized. Future updates may introduce an acknowledgment system to highlight changes.