Attachments
The Attachments tab is where you upload, replace, delete, and download files for your plan. This area is designed to give you a clear overview of all supporting documents upload or linked to the plan so you can manage them in one place.
How it looks
The tab includes a table listing all attachments, each attachment with its own row. You will see columns such as the filename, preview thumbnail, and action icons such as replace, delete, download, and review. Linked attachments show a link icon beside their name. Clicking the preview opens a larger view, similar to how attachments are previewed in RigFlow’s interface.
The interface helps you understand the status of each attachment at a glance, including whether it has reviews or is linked to a specific step.
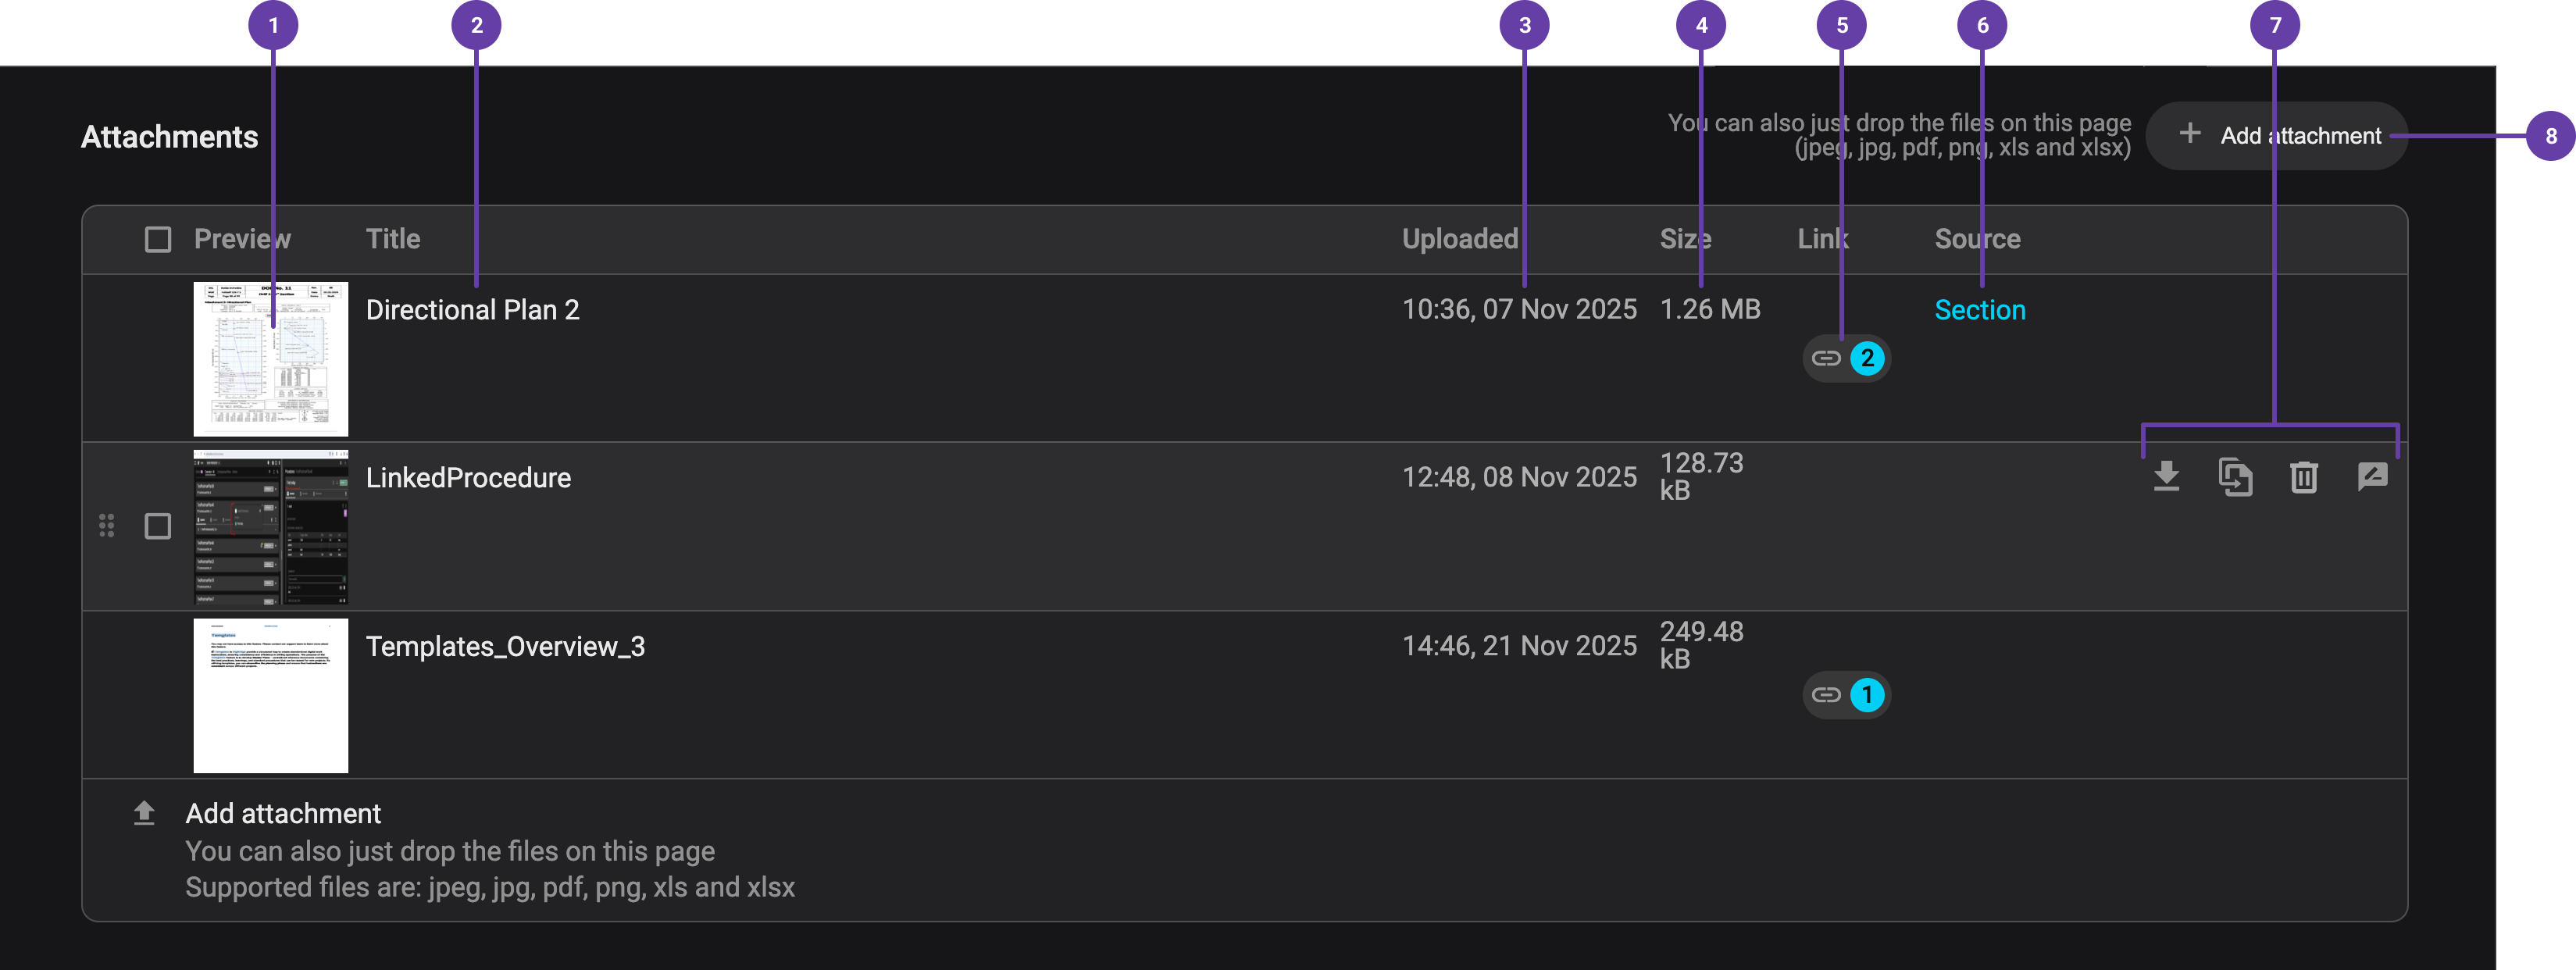
Inside the attachments tab, you’ll see:
File preview: Shows a small thumbnail of the uploaded file.
File title: Displays the file name; you can rename it by clicking on it.
Upload date: Shows the date and time the file was uploaded.
File size: Displays the size of the file in KB, MB, or GB.
Links to attachment: Shows how many places this file is linked.
Source: Indicates where the attachment is located within RigBridge.
Action bar: Provides options to download, replace, delete, or add reviews to the file. The action bar appears when you hover over the attachment row.
Upload button: Lets you upload new attachments to the plan.
Step-by-step instructions
Upload an attachment
Open the Attachments tab: Go to the Attachments tab for the plan you are working on.
Add files to the upload area: Click
 Add attachment , then choose
  Upload from your device , or drag and drop files into the attachment upload area to attach them to the plan.
Note
Avoid special characters in filenames to prevent upload problems.
Insert from hierarchy
Open the Attachments tab: Go to the Attachments tab for the plan you are working on.
Add files to the upload area: Click
Add attachment , then choose Insert from hierarchy to link an attachment to the plan.Find the attachment in the hierarchy: In the
 Link attachment modal, browse to the correct parent level (such as Project or Section) and select the file you want to link.
Insert the attachment: Review the preview that appears, then click the Insert button to link the selected attachment to the plan.
View the attachment source: In the attachment file table, you will see a Source column showing where the file was added from.
Replace an attachment
Select the row with the attachment: Hover over the attachment row you want to replace in the table.
Click the replace icon: Click the
 Replace file icon that appears on the right side of the row.
Upload the new file: Choose the new file from your device and upload it to replace the existing attachment.
Edit the name on the attachment
Select the row with the attachment: Hover over the attachment title in the row you want to edit.
Activate editing: Click the title to make the text field editable.
Save the new name: Type the new title, then press Enter, use Tab, or click outside the field to save your changes.
Delete an attachment
Select the row with the attachment: Hover over the attachment row you want to delete in the table.
Open the delete action: Click the
 Delete icon that appears on the right side of the row.
Confirm deletion: Confirm that you want to delete the attachment to remove it from the plan.
Note
If the attachment is linked in parts of the plan, those links will be removed when you delete it.
Download an attachment
Select the row with the attachment: Hover over the attachment row you want to download in the table.
Start the download: Click the
 Download file icon to download the attachment to your device.
Dock and undock a file
Open the file preview: Click the attachment’s preview image (located to the left of the attachment title) to open it in a modal.
Dock the file: Select
 Dock the sidepanel from the top-right corner of the modal to pin the file in the right sidebar so it stays visible while you work.
Release the file: Select
 Release from sidepanel to undock the file from the right sidebar when you no longer need it pinned.
Tips and Tricks
Dock attachments you use frequently to keep them visible while editing your plan.
Troubleshooting
If the delete icon does not appear, you may not have the required permissions.