Preparations
The  Preparations tab helps ensure all required checks are completed before starting a plan or step. While RigFlow doesn’t automatically prevent users from moving forward without completing these preparations, it will display a warning to confirm whether you're ready to proceed.
Preparations are assigned to specific roles within the operator and drilling contractor organizations, and can be linked to an entire plan or individual steps. These roles are selected from a dropdown list. RigFlow organizes these checks based on their assigned roles, and as a plan author, you can choose to make them active even while the plan is still in draft mode.
Step-by-step instructions
Create a preparation
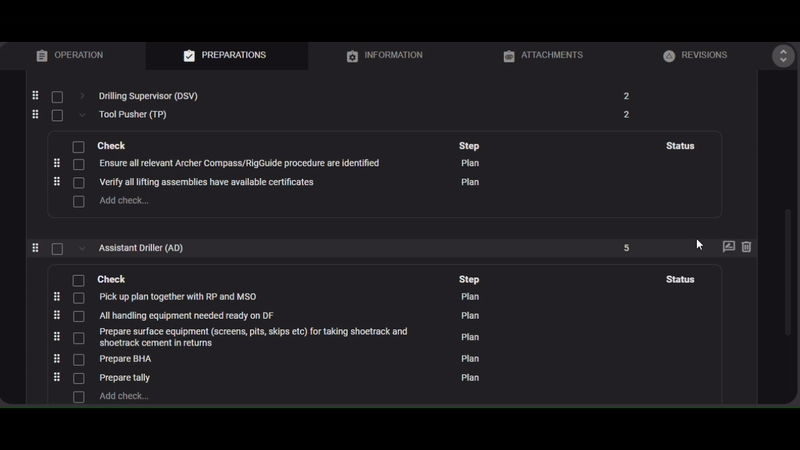
Navigate to the Preparations tab: Select a plan and open it the
 Plan editor. Once there, click on the Preparations tab.
Add a responsible job role: Click
 Add new check group. Then, choose a responsible role from the
  dropdown list or search for it.
If you select External generic role (GEN), a row labeled Responsible party will appear below. This description helps group and filter preparations tied to GEN roles across preparations, parallel activities, and report backs in the Operation tab.
Add checks under the role: Once you select a role, a checklist table will appear. If you don’t see it, click the
 arrow next to the role name to expand it. Click Add check to enter the tasks that need to be completed.
Link the check to a step or plan: Use the
dropdown next to each check to choose whether it applies to a specific step or the entire plan.Repeat as needed: Add more check groups for other roles and fill out their checks. Repeat until the preparation list is complete for your plan.
Notice
It is not possible to add any attachments to a preparation.
Edit a preparation
Find the check to update: In the
Preparations tab, scroll to the check you want to edit.Click to make changes: Click directly on the text of the check or step. You can now add, edit, or delete the content.
Save your changes: Press
Enter,Tab, or click outside the box to save what you updated.
Move a preparation
Locate the preparation: In the Preparations tab, find the check or group you want to move.
Drag it to a new spot: Click and hold the
 Move icon, then drag the item to where you want it in the list. Release to drop it in place.
Note
Moving a preparation between responsible parties isn’t supported yet. You can copy it instead, read more on the copy a preparation section.
Copy a preparation
Identify the check to copy: Go to the
Preparations tab and locate the check or group you want to copy.Copy a single responsibility or check: Hover over the item. When the icons appear on the right, click the
 Copy icon.
Copy multiple responsibilities and checks: Use the checkboxes on the left to select multiple checks or roles. A blue bar will appear at the top. Click the
Copy icon there.Paste to a new location: Navigate to where you want to add the copied content. Click the
 Paste icon next to Add check or Add new check group.
Delete a preparation
Identify the check to delete: Open the plan, go to the
Preparations tab, and find the check or role you want to remove.Delete a single responsibility or check: Hover over it, then click the
 Delete icon that appears on the right.
Delete multiple responsibilities and checks: Use the checkboxes on the left to select several entries. A blue bar will appear at the top. Click the
Delete icon there.Confirm deletion: A confirmation box will pop up. Click Delete to permanently remove the item. This action cannot be undone; upon clicking delete, the file will be permanently deleted.