Using grids in RigBridge
The grid in RigBridge is a versatile feature designed to enable users to input, organize, and manage data efficiently. It is handy for creating and editing plans in applications like the  Plan editor and
  Plan overview. With capabilities such as drag-and-drop rows, multi-level grids, and intuitive editing, the grid simplifies operational planning for all RigBridge users.
How it looks
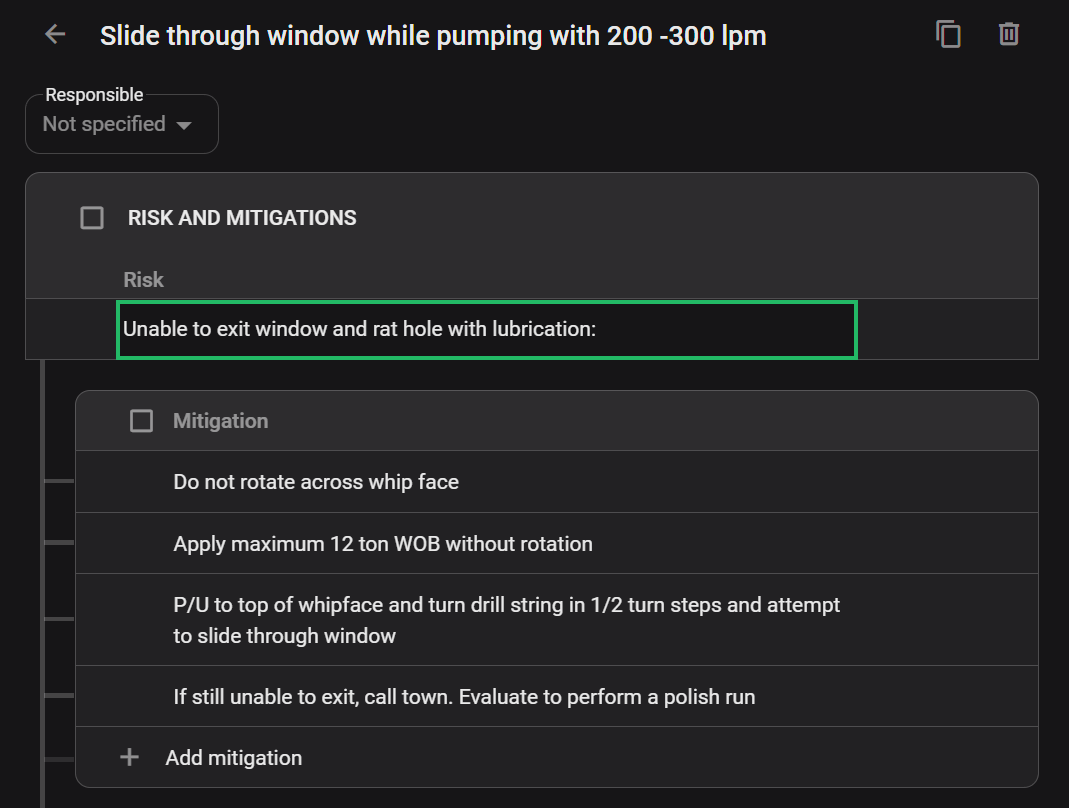
The grid is structured like a table, composed of cells grouped in rows and columns. Key visual elements include:
Headers: Clearly distinguishable with lighter shading, displaying column names.
Editable and non-editable cells: Editable cells are interactive and highlight upon hover, while non-editable cells are grayed out and do not respond to mouse hover.
Action panel: Located on the right side of each row, providing options to copy, delete, or favorite the row.
Multilevel structure: Rows can be expanded or collapsed to show nested data, providing a clear overview and detailed drill-downs.
Add new content: This appears below the grid, extending across its width, and allows inserting new rows or sections.
Key features
Keyboard Shortcuts: Quickly navigate and edit without excessive clicking.
Drag-and-Drop Rows: Rearrange rows for better organization.
Multi-Level Grids: Manage complex datasets with expandable and collapsible rows.
Row Actions: Add reviews, copy data, or delete rows effortlessly using icons.
Data Entry Options: Cells can include text fields, dropdowns, or search boxes for streamlined data input.
Hover-Activated Options: Actions, like copying, pasting, and adding parallel activities, are dynamically displayed.
Step-by-step instructions
Adding content to the grid
Add a new row: Click the
 Add button located below the grid. A new row will immediately appear, and the first cell in that row will be ready for you to type in.
Fill in details: Type your data directly into each cell, or choose from the available dropdown options when shown. You can move to the next cell quickly by using the tab key or clicking on the cell with your mouse.
Save your entry: To confirm what you’ve entered, click anywhere outside the grid or press Enter on your keyboard. This ensures your data is saved and the row is added to the grid.
Copying and pasting rows
Select and copy: Hover over the row you want to duplicate. When the row actions appear on the right side, click the
 Copy icon.
Choose where to paste: Scroll or navigate to the section of the grid where you want to add the new row.
Paste the copied row: Click the
 Paste icon, located next to the Add button in that section. The copied row will appear immediately in the grid.
Managing multiple rows
Select the rows: Click the checkboxes on the left side of each row you want to manage. You can select as many rows as needed.
Copy or delete: Once your rows are selected, a header panel will appear at the top of the grid. From here, choose
Copy to duplicate the selected rows, or  Delete to remove them.
Paste multiple rows: Go to the location in the grid where you want the copied rows to appear. Click the
Paste icon next to the Add button, and all the copied rows will be inserted.
Examples
Editing Content: Hover over editable cells. When the cell is highlighted, click to make changes. For dropdown cells, select the desired option from the list.
Multi-Level Grid Navigation: Expand or collapse a row to view or hide nested data by clicking the arrow icon on the left.
Tips and tricks
Use Keyboard Shortcuts: To quickly add or edit content. S
Bulk Actions: Select multiple rows for mass operations like copying or deleting.
Hover to Discover: Hovering reveals additional options, such as row actions and tooltips.
Grid shortcut keys
Shortcut Key | Action |
|---|---|
Ctrl + C | Copy selected row or cell content. |
Ctrl + V | Paste copied content into a new row or cell. |
Ctrl + X | Cut selected content. |
Ctrl + B | Make text bold. |
Ctrl + Shift + V | Paste plain text. |
Page Down | Move to the next step. |
Page Up | Move to the previous step. |
Shift + Enter | Soft return (new line without bullet break). |
Enter | Create a new line or bullet point. |
Enter (twice) | End a bullet list. |
Troubleshooting
Missing Grid Options: Ensure you are in the appropriate application (Plan Editor or Project Planner). Check your user permissions for editing or adding content.
Data Not Saving: Ensure you've clicked outside the grid or pressed Enter to save changes. Refresh the browser if changes are not reflected immediately.
Icons Not Appearing: Verify you are hovering over the correct area. Ensure your browser supports RigBridge's interface features.