Project activation
Project activation is a new feature in RigBridge that allows users to activate projects integrated from third-party planning tools directly in the user interface. Previously, projects had to be manually added in the backend to the RigBridge database before they became available to the users.
How it looks
When you navigate to the Plan Overview, you can find the  Integration tab on the Right sidebar. This provides a visual layout where you can find and activate projects from third-party systems.
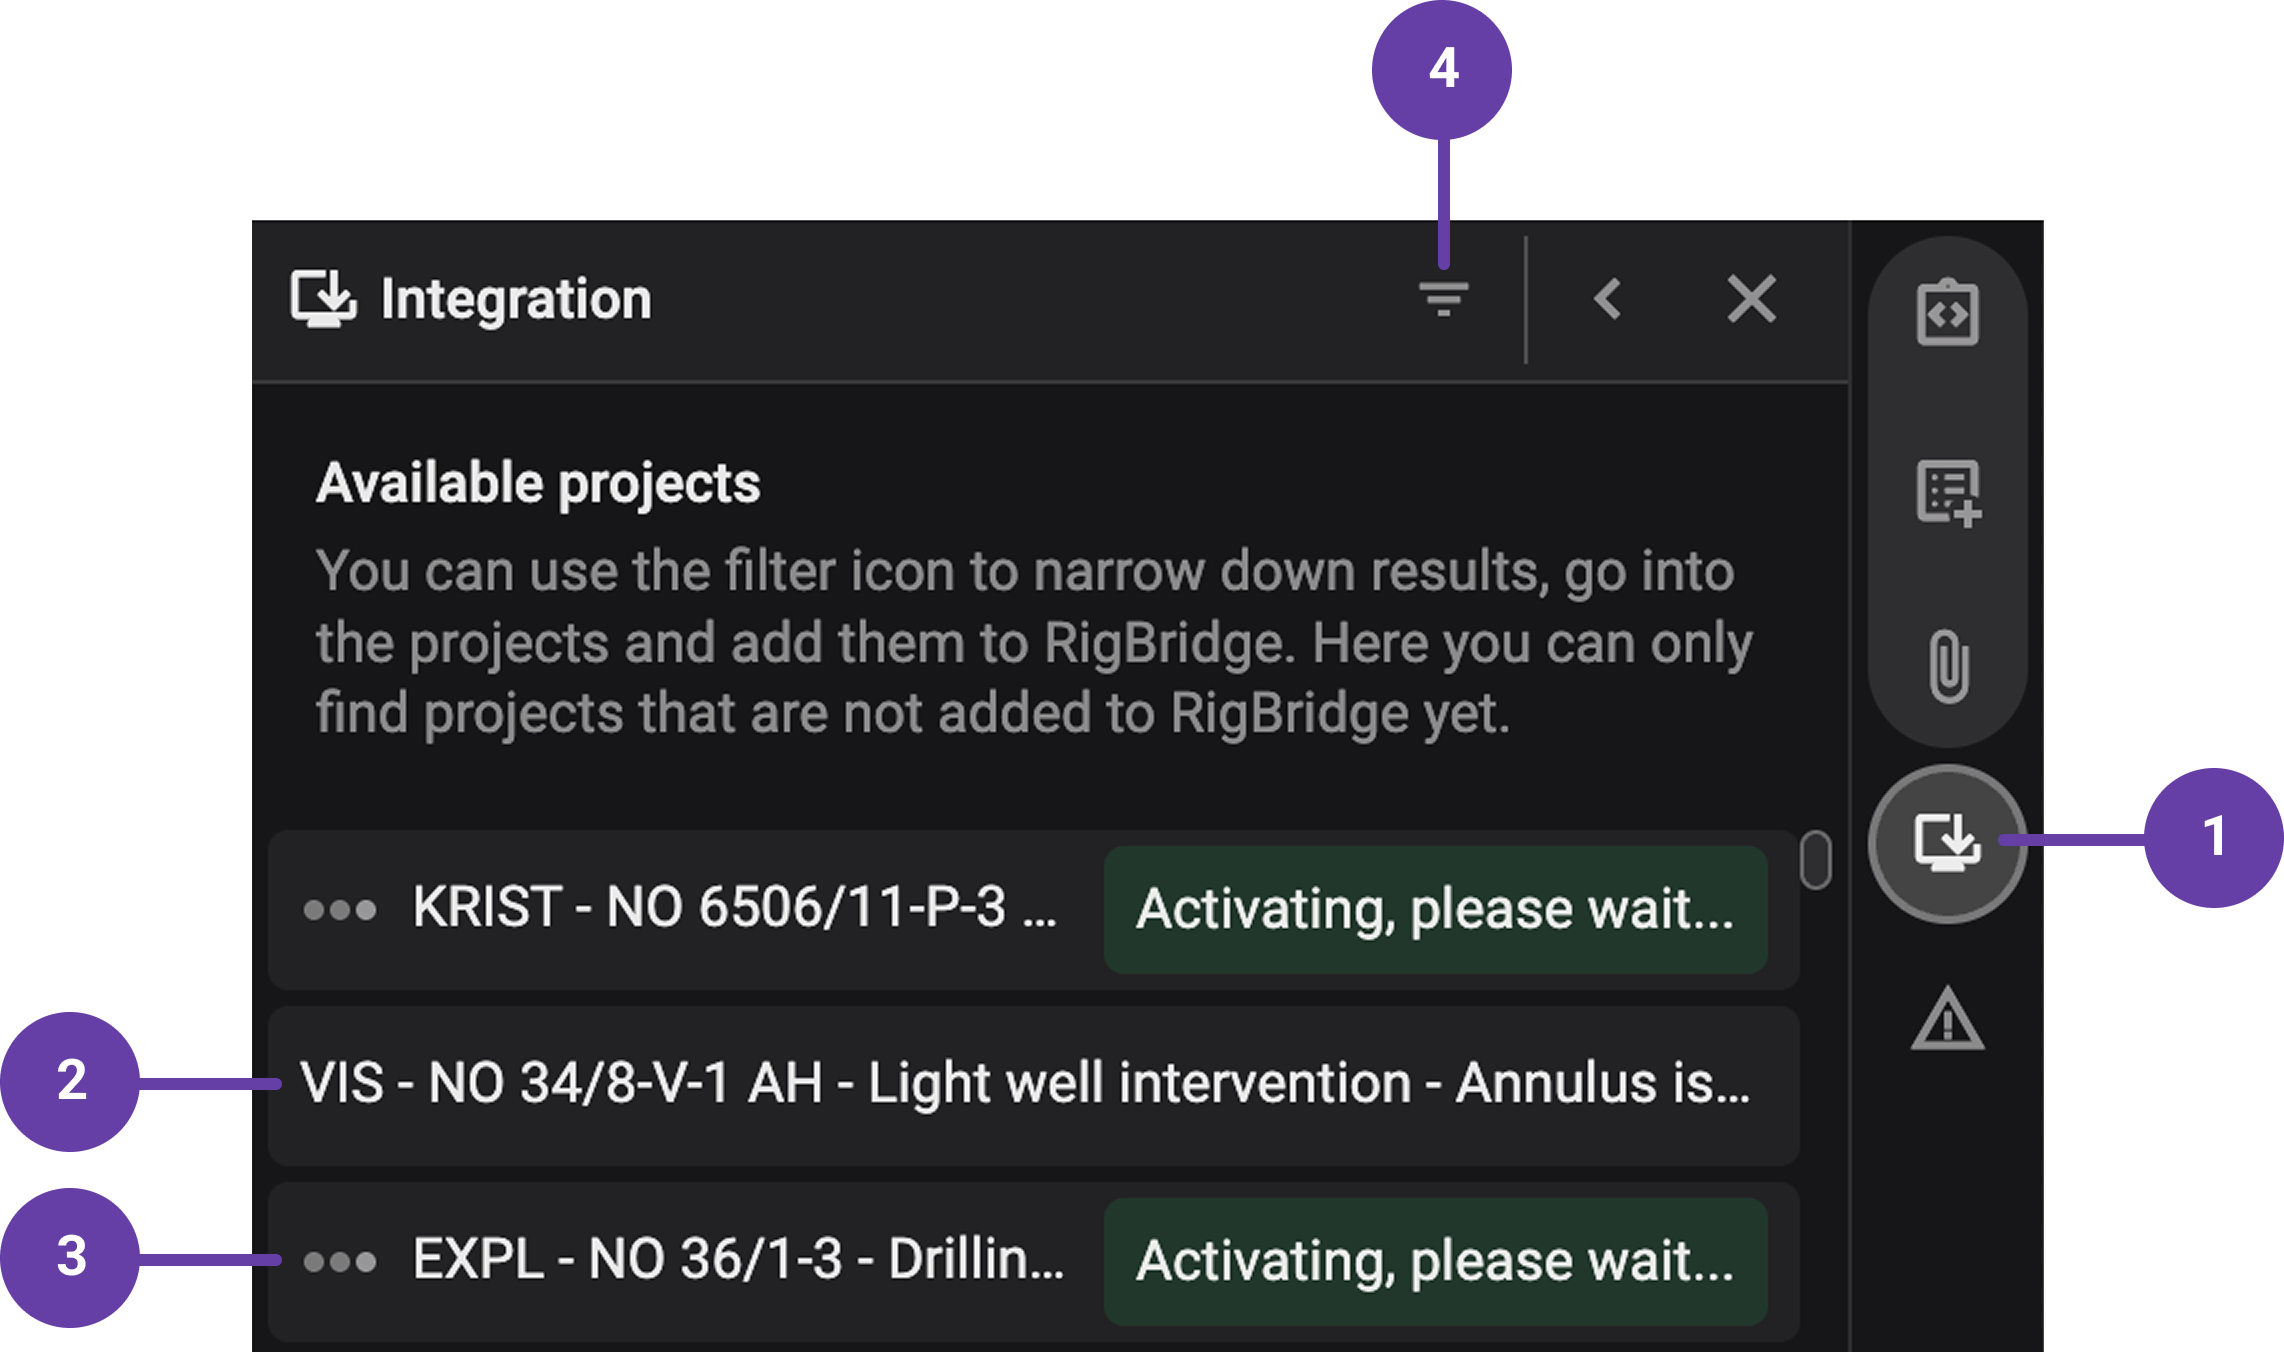
- Integration icon: Located in the Right sidebar, the Integration icon is your entry point to the project activation feature. Clicking it opens the Integration panel, showing all available third-party projects ready for activation.
Project cards: Each card represents a single project and includes key details such as the project name, associated rig, and field. These cards make it easy to browse, select, and verify the right project before activating it and adding it to Plan Overview.
Activated project card: After adding a project, its card updates with a
 running status indicator and a label that says Activating, please wait. This message means the system is processing the activation. Once done, the project card disappears from the right panel and appears in the Plan Overview, confirming it is now active and ready for the user to work on.
 Filter: This dropdown allows you to narrow the visible projects by criteria such as field or rig, which is especially helpful when many projects are listed in the Right sidebar.
Step-by-step instructions
Open the Integration panel: Go to
 Plan Overview and click on the Integration icon in the Right sidebar.
Find a project: Once the
Integration panel is open, a list of available projects will be displayed. You can scroll down the list or use the filter option to narrow the available projects list by phase, field, or rig.Select and review the project: Select the desired project and click on its card. A pop-up window will open, allowing you to review the project details.
Add project: On the pop-up window, click the Add project button. After confirmation, the project will show an
activating status and will move to the Plan Overview panel.Ready to use: The newly added project will be ready for the user to start working on it, containing the imported data from the third-party integrated application.
Tips and tricks
Check before confirming: In the pop-up, verify the correct field and rig to avoid accidental activation.
Use filters: Use the
filters on the integrations panel to quickly find the project you need.Be aware of phases: Only projects in the right phase will appear in the activation list.
Project access: If you don’t see a project, check your permissions or project phase status.
Troubleshooting
Accidental activation: Projects cannot currently be deactivated via RigBridge. You must contact our 24/7 support team.
Permission errors: Only users with specific roles can activate projects; otherwise, an access restriction message will appear.
Activation delay: Activation can take time due to ongoing deployments or integration sync issues. Wait a few minutes and retry.