Insights on templates
RigBridge includes a feature that lets you send Insights from an active, published, or AAR plans directly into a Template. This helps you keep track of useful information discovered during operations and makes it easier to reuse it in future planning.
How it looks
You’ll find Insights in the Right sidebar of both the Plan editor and Template Editor. This section explains where to find each part of the insight workflow on screen, and how to take action, whether you’re adding a new insight, approving one, or elevating it to the parent template.
Insights panel in Plan editor
When you're working in the  Plan Editor, you’ll notice the
  Insights icon on the Right sidebar. Clicking this reveals the full list of insights tied to the plan.
Each insight entry includes a  Send to master template button that allows you to transfer the insights to their related master template. It will open an Add to parent template modal that allows you to review and edit. The icon will change color to indicate successful submission.
Template Editor insights sidebar
In the  Template Editor, insights appear on the Right sidebar under a dedicated Insights section. Each card contains:
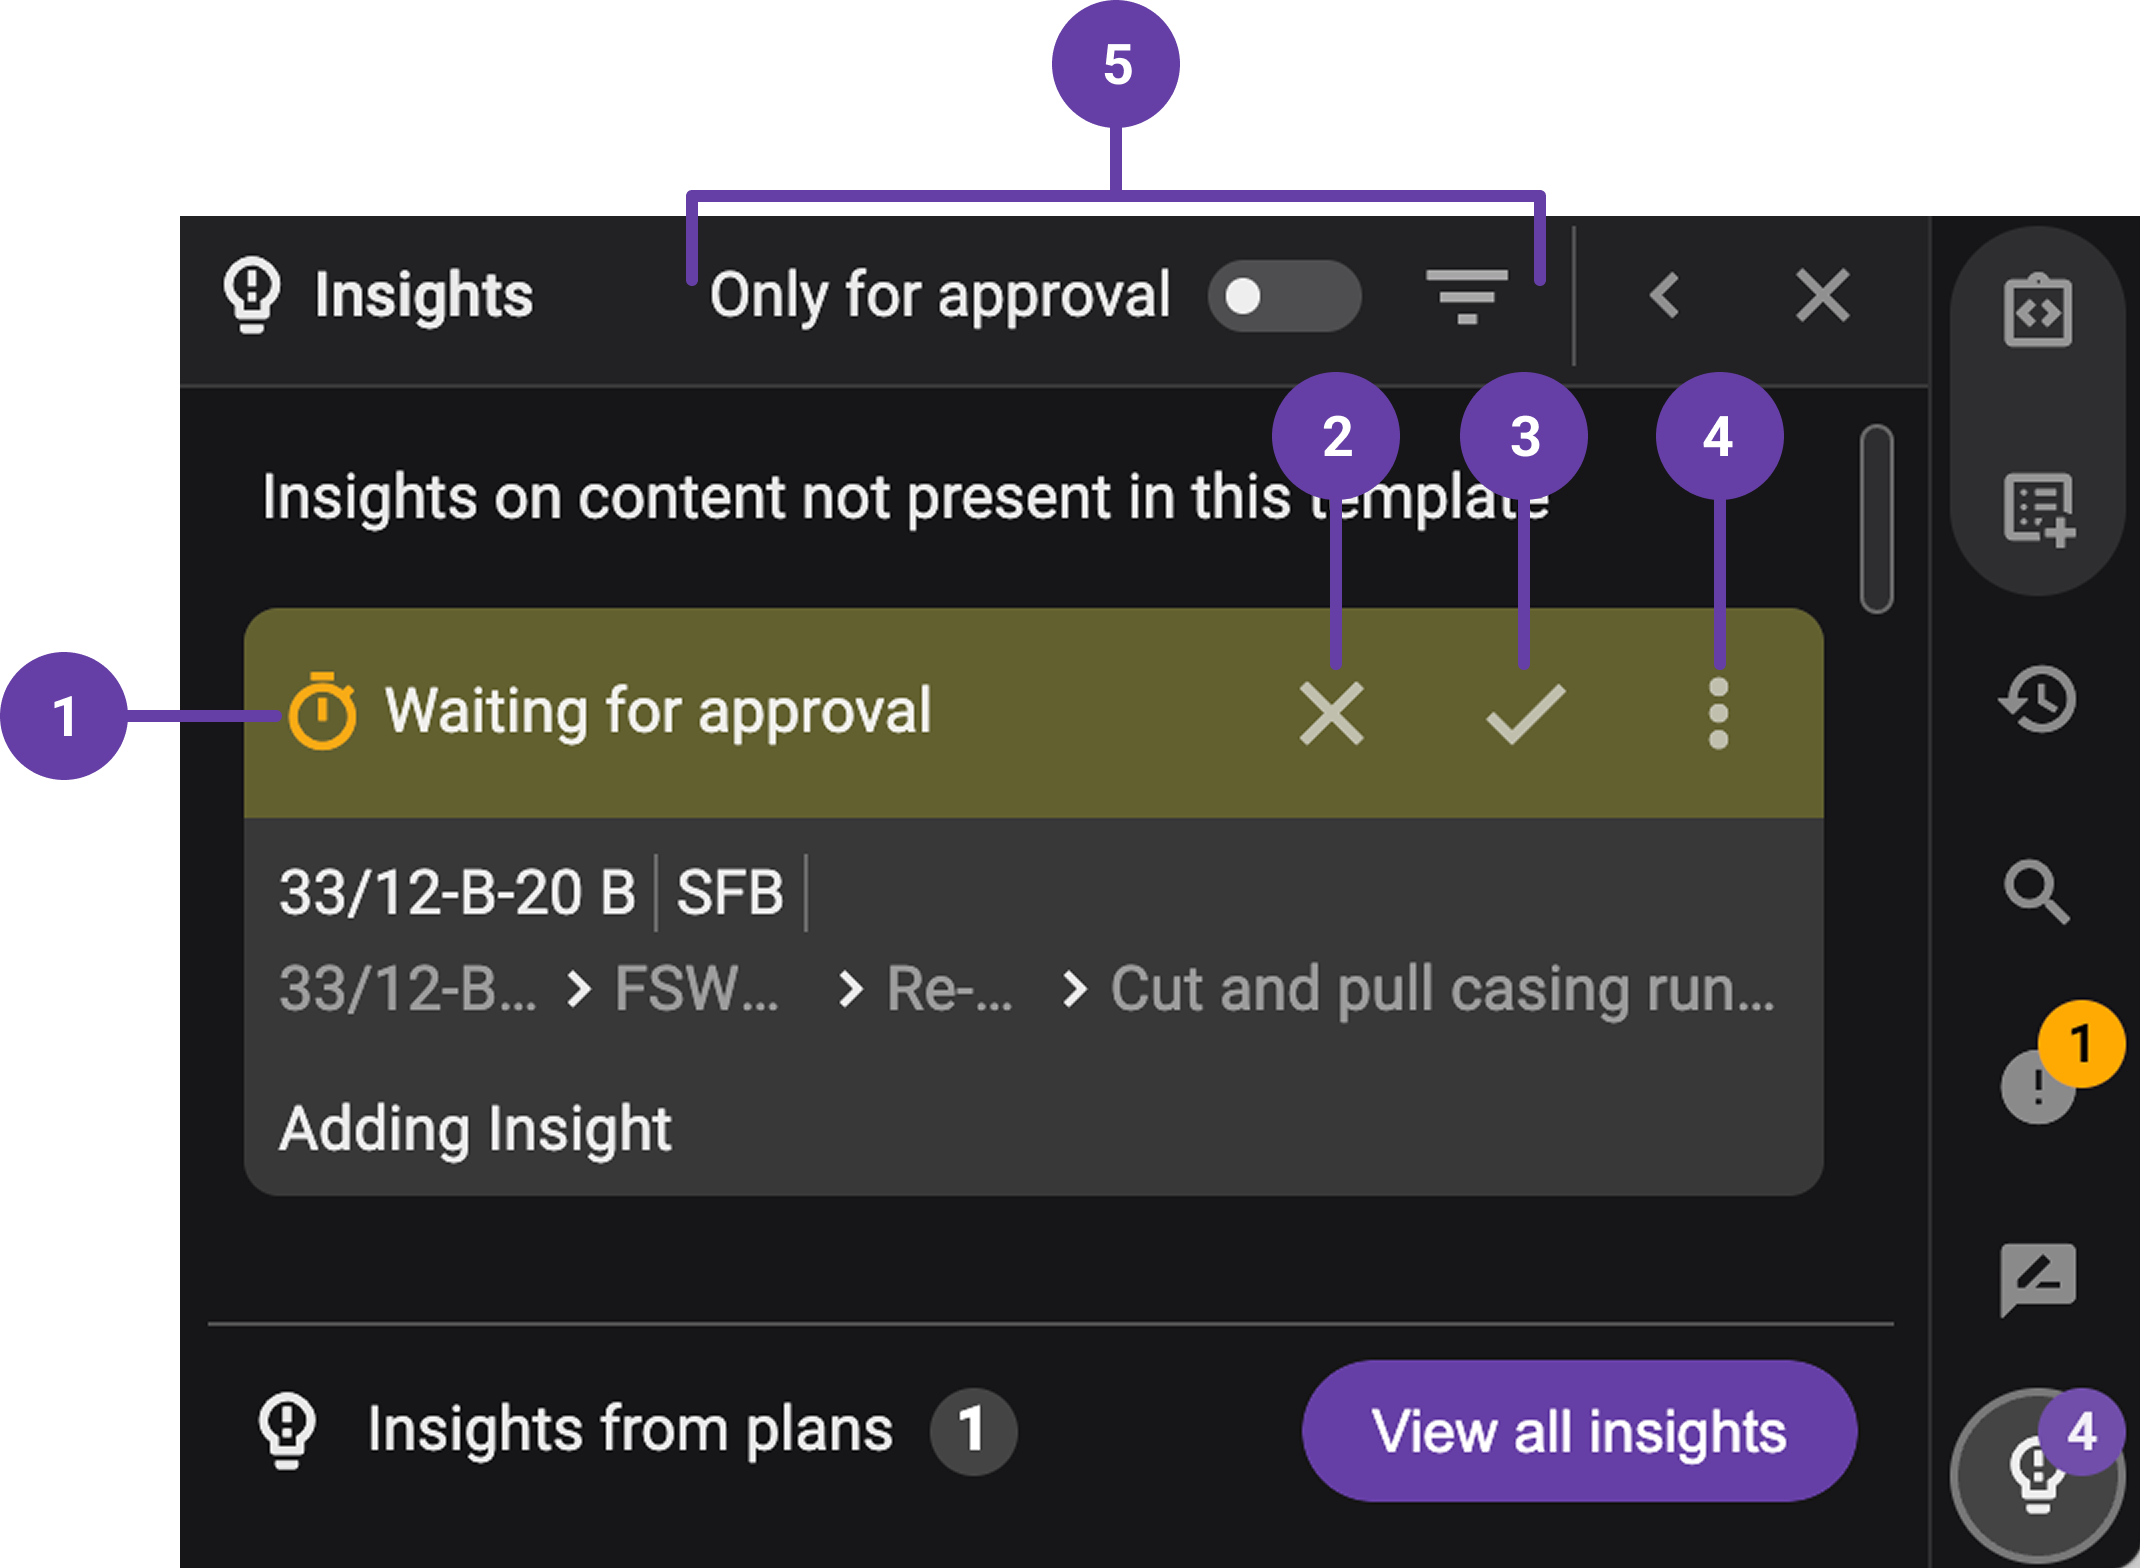
Insight status indicator: Each insight card includes a status indicator on the header that visually shows where the insight stands:
 Waiting for approval - Newly submitted insights that require action.
- Included in insight list - Insights saved for reference but not yet added to the active template.
 Implemented - Insights that have been formally approved and included in the active version of the template.
 Reject action button: Available only for Insights in the waiting for approval state. Clicking this allows you to reject the insight and, optionally, leave a comment explaining the reason for rejection.
 Approve action button: Also visible for insights waiting for approval. This button presents two approval paths:
- Set to implement – Adds the insight directly into the active template.
- Include in insight list – Saves the insight for future consideration without implementing it immediately.
 More icon: This menu adapts based on the insight’s status. Actions can include:
Viewing additional insight details.
Reopening a previously implemented insight.
Editing, rejecting, or implementing an insight already included in the list.
Accepting or rejecting an insight if it’s still pending approval.
 Filters and toggle: These elements allow you to control which Insights are shown. The filter icon allows you to show only implemented or rejected insights. The Only for approval toggle limits the view to Insights awaiting approval. Turning it off shows all Insights, regardless of status.
Insights from plan steps
When Insights are added at the individual step level in a plan, they are grouped under the Insights from plans section located at the bottom of the Insights Right sidebar application of the Template Editor.

Clicking on the View all insights button opens a modal window that includes the following elements:
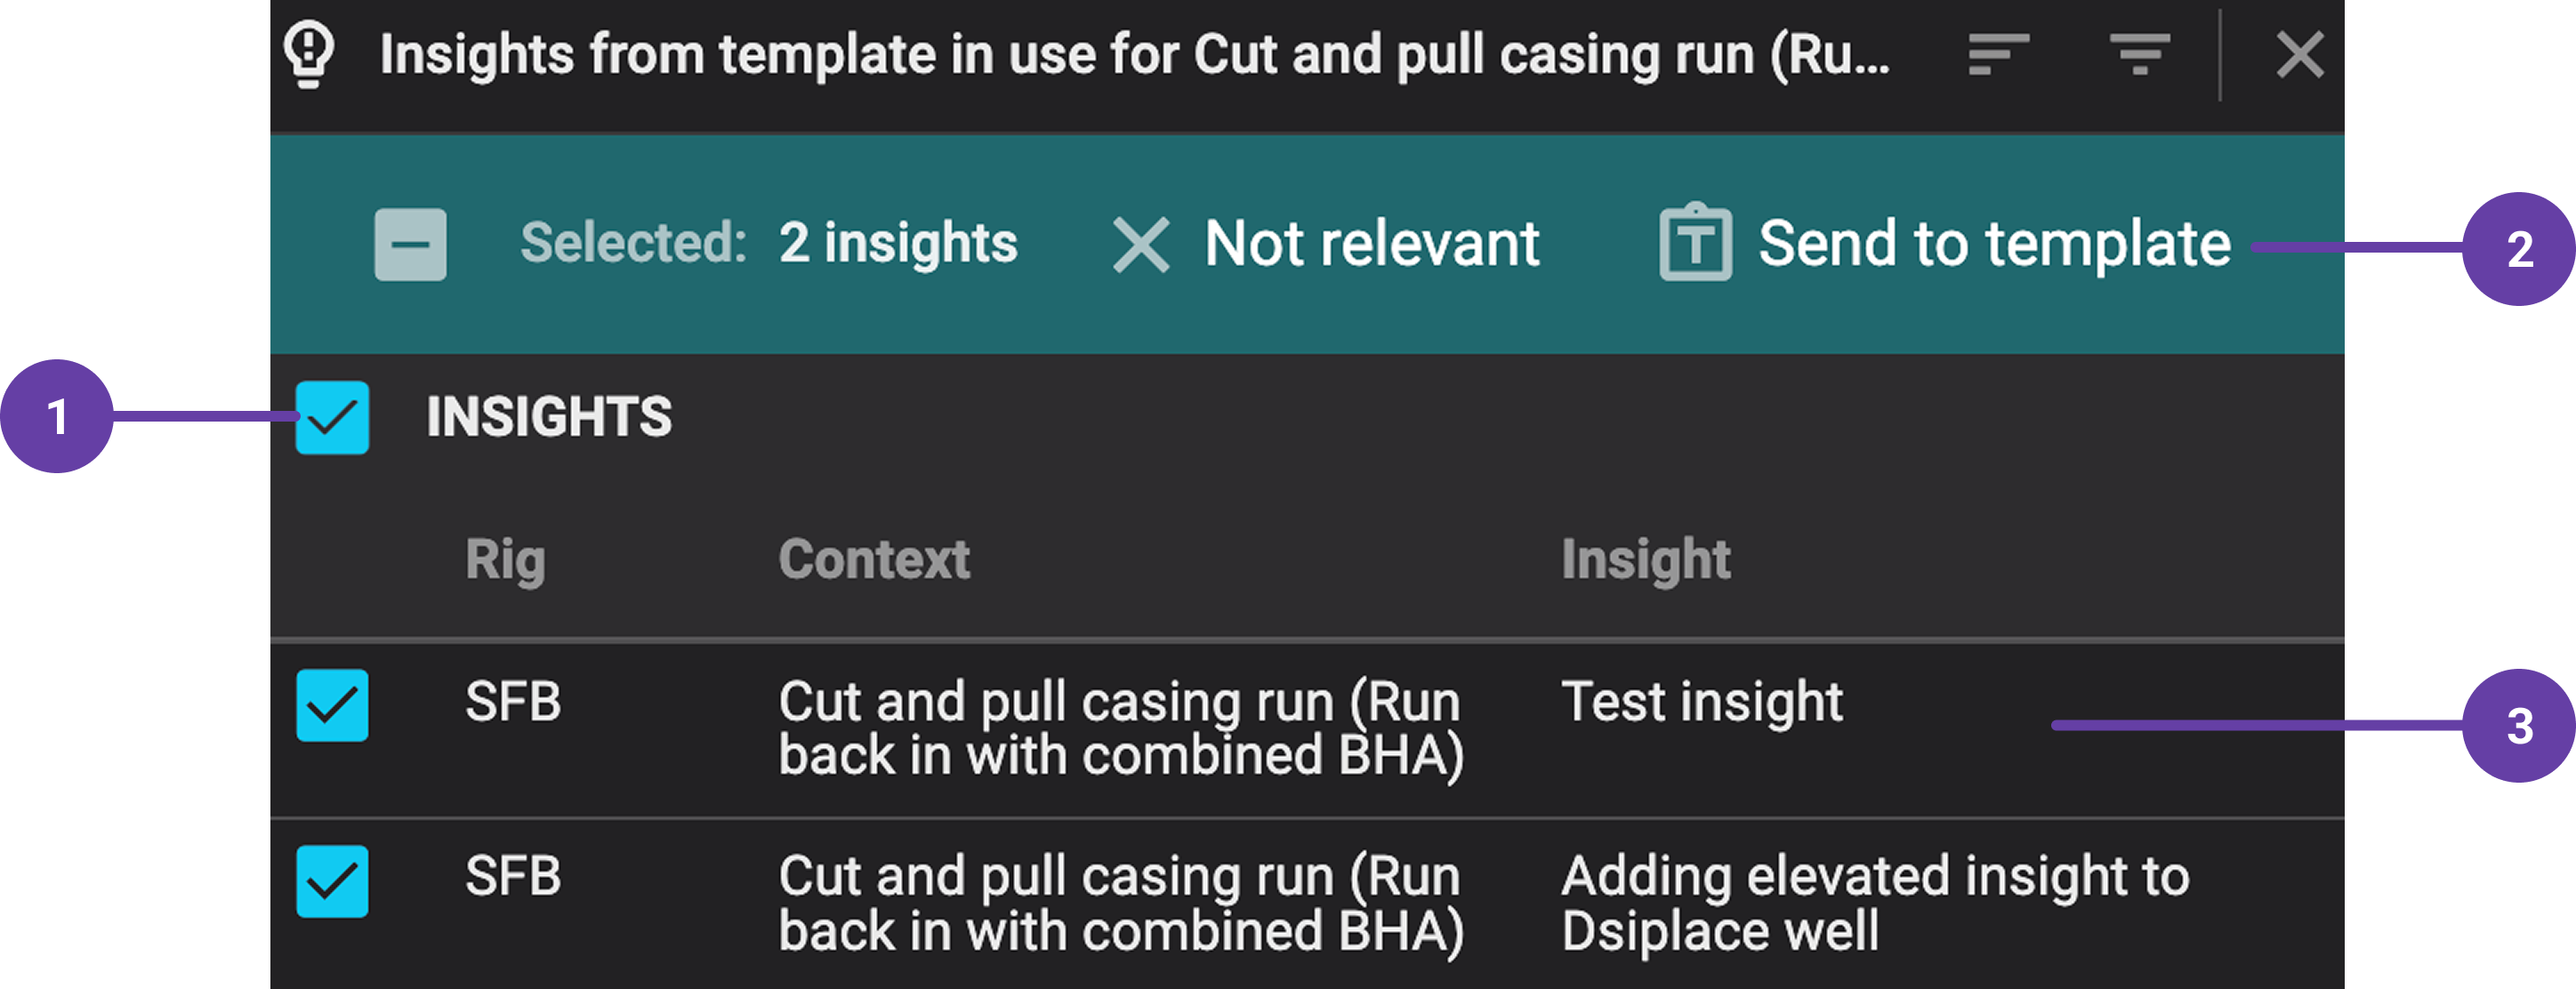
Insight selection checkboxes: Each insight entry has a checkbox that allows you to select one or more insights. You can also use the select-all checkbox in the header to quickly select all entries in the list.
- Send to template button: Once insights are selected, clicking this button moves them to the main Insights panel of the template, where they will appear with a “Waiting for Approval” status. From there, they follow the normal approval workflow.
Insight preview and details: Each insight entry in the modal shows a preview of the content, along with key metadata.
Step-by-step instructions
Add insight to a master template
Open Plan Editor: Select an active, published, or AAR planand open it in the
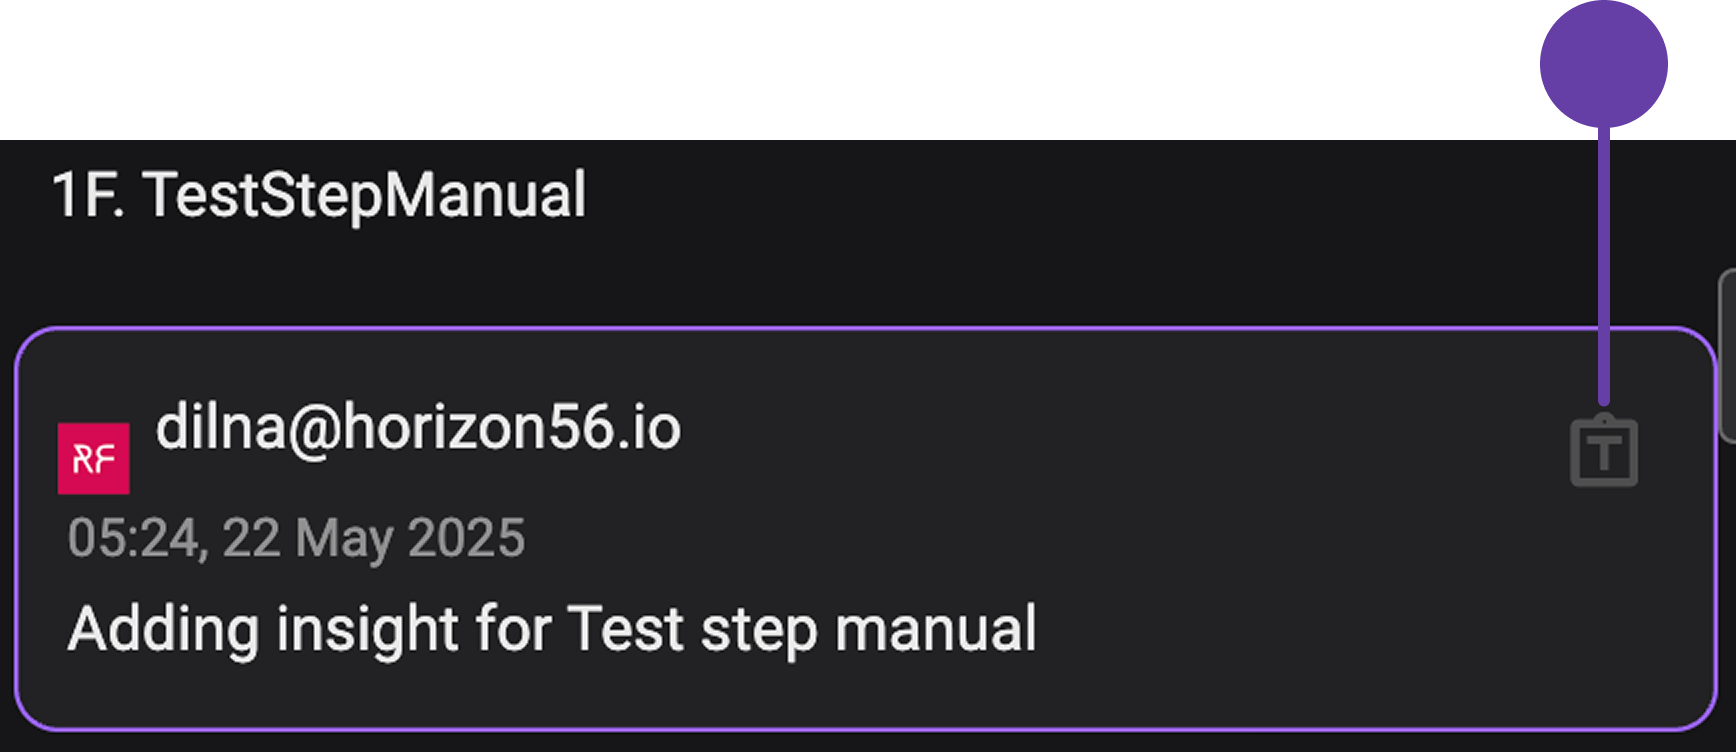
Plan Editor in RigBridge.Go to the insights panel: Click on the
Insights icon in the Right sidebar.Send to template: Locate the insight you want to add and click
Send to master template.Add to template: A modal window labeled Add to parent template will open. In this modal, you can add any modifications or attachments if needed.
Confirm: Click Add to confirm. The
send to master template icon will change color, showing that the insight has been added.Waiting for approval: The insight will now appear in the parent template’s insight panel on the
Template editor. The insight's header will indicate it is waiting for approval.
Review and approve insights in the template
Header options: In the insight header, you’ll see options:
Reject, Accept, or More.Use the More button to:
 View insight details
- Reject the insight
- Set to implement (on the accept dropdown)
- Include in Insight list (on the accept dropdown)
Include in Insight list: If you select
Include in Insight List, the insight will be saved for future use, but not added to the active template yet.Implement the insight: From the insight list, you can edit, reject, or set to implement the insight by clicking on the
more menu. Once implemented, the insight will move to the Implemented Insights list, showing it's active in the template.
Add insights from plan steps
Add insights from a step: On the
Plan editor, you can add insights directly from a step by clicking the Insights icon next to the step. Read more about insights here: ???.View insights: These insights are collected and visible in the
Template Editor. Go to its Right sidebar, and click on the Insights icon.Review pending insights: Go to the bottom of the panel, and click on the View all insights button to open a modal listing all pending insights from various plans.
Send to template: Click the checkbox of the ones you want to include, then click
Send to template and confirm.Approve insights: These insights will now appear in the
Insights panel, awaiting approval.